Is It Possible To Have a Double-Sided (T-shirt) Quilt?
by William Sanders
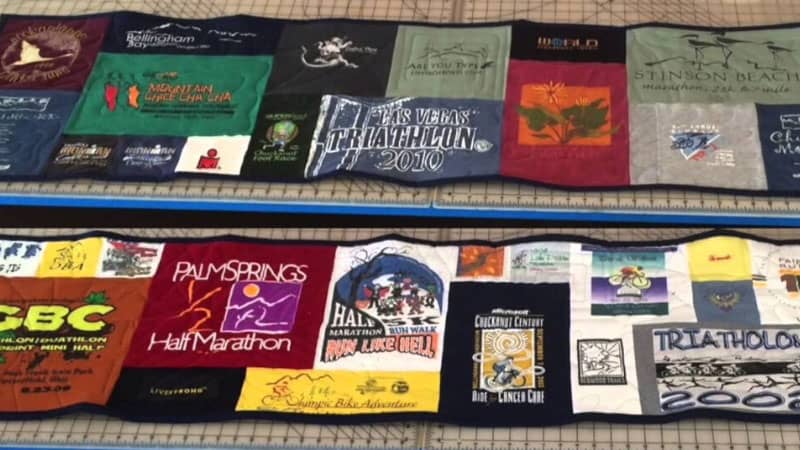
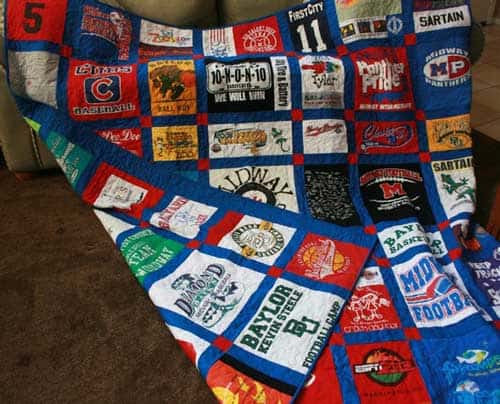
One of the best ways of repurposing your old t-shirts and preserving the memories associated with them is turning them into a t-shirt blanket quilt.
What if you make both sides of the quilt with the old tees? You can already imagine what the resulting double-sided t-shirt quilt will look like…with both sides of featuring your cherished memories.
BUT…you might have your doubts about whether it’s really possible to come up with this type of a quilt.
Contents

Can You Make A Double-sided T-shirt Quilt?

Yes, a double-sided t-shirt quilt is 100% possible.
As you already know, the basics of quilting involve stitching together up to 3 layers—the top layer, the middle (batting or wadding) layer, and the bottom layer.

The result is a heavy, warm comforter that you can use as your couch throw, picnic blanket, or you can make it a pet’s blanket. What’s more, assuming you’re using cotton tees, you’ll obtain a pretty durable quilt that’s 100% machine washable for easy care.
When it comes to quilting a double-layered t-shirt blanket, however, you might consider doing things a bit differently to ensure you achieve the best results.
For instance, you might consider not putting a middle layer between the top and bottom t-shirt layers.
Why?
This is simply because your resulting double-sided t-shirt quilt will already feel heavy and warm without any batting between the layers.
However, different quilters have different opinions regarding adding a batting (or the middle layer), so it’s up to you whether to include anything between the top and backing or not.
Something else to put in mind when making this kind of quilt is that hand quilting can be pretty challenging for such a large and might not even work due to the weight and bulkiness of the project. So, consider machine-quilting for this project as its less a hassle.
Top TIPS for Double-sided T-shirt Quilting
- As much as possible, ensure the t-shirts you use for this kind of project are made from the same material. This will help prevent you from dealing with all sorts of wrinkles and stretched areas every time you wash your double-sided t-shirt quilt.
- Before working on this project, you might consider doing a test project by making a small square, like a pillow or pillow cover. This will not only give you a feel for the project but will also help you determine how hard hand-quilting or machine quailing will be.
- Prepare your workspace in advance. You’ll need plenty of room behind your sewing machine and a chair where you can easily rest the bulk to help ease the quilt into your feed dogs and avoid breaking the needles. You might also consider pulling, stretching, and even rolling up your quilt such that its bulkiness lies to the left of your sewing machine, rests on the chair, or even on your shoulder.
- If you’re using stretchy cotton t-shirts for your quilt bottom/backing, then you might consider tying your quilt to make it look structurally sound. This is as simple as bringing down the yarn with the needle through the 3 layers and then back up again, cut, and knot.
- If you’re a beginner in the quilting field, consider taking some machine quilting lessons before you can start working on your old tees to turn them into a double-sided memento.
How To Make a Double-sided T-shirt Quilt?
In this upcoming section, we’ll share with you an easy, quick step-by-step guide that you can follow to come up with a double-sided quilt from your old tees.
Follow these directions:
Step 1—Determine the size of your quilt.
Obviously, the first thing you need to do is determine the size of the quilt you wish to come up with.
Ideally, you want something that fits your bed perfectly. If you like, you can make something a bit larger than your bed so that it overflows when spread across your bed.
Measuring the size of the bed you want to make a quilt for will go a long way in helping you come up with a great end product that looks right at home on the bed.
Step 2—Cut the quilt panels.
In this step, you get down to the business of cutting your old tees into panels with the help of measurements you obtained in the previous step.
Keep in mind, though, that this step will consume most of the time for this project.
After fussy cutting all the panels to size, you’ll need to spritz starch around the perimeter of each of them and iron dry.
For starters, starch helps keep the knit fabric of your tees from curling, helping you easily sew the panels without the fabric bunching up under the feed dogs. Moreover, this will save you from having to employ the zigzag stitch to keep your fabric from stretching.
We can’t stress enough how spraying around the perimeter of your panels with starch will contribute to overall good looking results, so don’t skip it.
Step 3—Sew the quilt panels together.
With all your panels, well-cut, ironed, and starched, it’s time to sew them together to create your top quilt and the backing layer.
Both layers are equal, and you can start with any of them.

For this part, consider sewing fewer and longer seams as they make your work easier. Piece each column of your quilt first, and then sew the columns together.
If you want to hide the seams on your quilt, then make sure you sew the right sides of your quilt panels together.
Step 4—embellish to your top layer (optional)
If you wish to add any embellishments or appliques to your quilt, you can do so in this step.
Don’t have a clue how to decorate your quilt?
A smart way to do this involves cutting out the small graphics or pockets from your old tees, starching them up, and appliqueing them across your top quilt.
The decorations not only make your quilt look more attractive but can also help hide any stains, seams, and other unsightly spots or areas on your top quality layer.
Step 5—Prepare/sew the middle layer.
As we said earlier, a double-sided t-shirt quilt is quite bulky and warm, and you might not necessarily need to include the middle layer.
If you still feel that you need to add the batting, however, this is the part to do so.
Prepare an ample space on the floor of your workspace and lay out the fleece—make sure it’s larger in length and width than your quality top.
Use the taping mask to tape it all the corners as well as along some spots along the fleece perimeter to help keep it taught and flat.
Grab one of your quilts and lay it over the fleece, with the right side out. You’ll need to stretch the quality top too to make it smooth and taught.
Pin it to the fleece correctly, and then sew or baste the two layers together around the quilt perimeter.
Remember to trim your fleece so that it appears flush with the quilt top around the (quilt) perimeter.
Step 6—Sew the layers together.
With the middle (fleece) and bottom quilt layers sewn together, the next thing you need to do is sew the second layer to complete your double-sided t-shirt quilt.
With your quilt still on the ground, with the fleece facing up, lay the second quilt on top (with the right side up).
Pin the top quilt to the rest of your quilt and ensure the seams to the front and back match. Then, sew all the parts together. Remember to keep the top and bottom layers matched as you sew.
After you’re done sewing your quilt, you might consider tying it (this is optional, though) to make it structurally more sound. This is quite easy to do, as we explained earlier on.
Final Verdict
A double-sided t-shirt quilt is one of a kind project that helps you put your old t-shirts to good use instead of throwing them away. It also enables you to preserve the memories associated with your t-shits on both sides of the quilt.
Having read through this guide, now you know that it’s 100% possible to come up with a double-sided t-shirt quilt.
If you don’t have a clue where to start with this kind of project, we have included an easy to follow, step by step guide at the end of this post on how to do it and end up with a nice-looking, snugly, and comfy t-shirt memory blanket from the comfort of your home.
 |
 |
 |
 |
 |
 |
 |
 |

About William Sanders
William Sanders was born and raised in California. After receiving his Master’s degree in information science from San Diego State University, he started working as a city councilor. In his spare time, William enjoys playing best-selling MMORPG games such as World of Warcraft and Fnal Fantasy, where he often takes on the role of guild leader with hundreds of players collaborating for success under his leadership. William is also a regular contributor to some popular magazines such as San Jose Mercury News, Gleanster Research, and Palmgear.
Leave a Reply
You can get FREE Gifts. Or latest Free phones here.
Disable Ad block to reveal all the info. Once done, hit a button below
 |
 |
 |
 |