How to Quilt with a Sewing Machine? | Palmgear
by Alice Davis
It might sound a little old-school when you talk about quilting with a sewing machine, but hey, old is gold!
And for the rookie craft lovers who just have invested on an ordinary sewing machine and relentlessly working hard to mount a perfect piece of quilt, rejoice!
You don't need to worry more!
Because you can definitely ace the machine sewing processes, tactics, and hacks easily!
Hence, today, I will share with you how to quilt with a sewing machine!
Let's get started then!
Contents
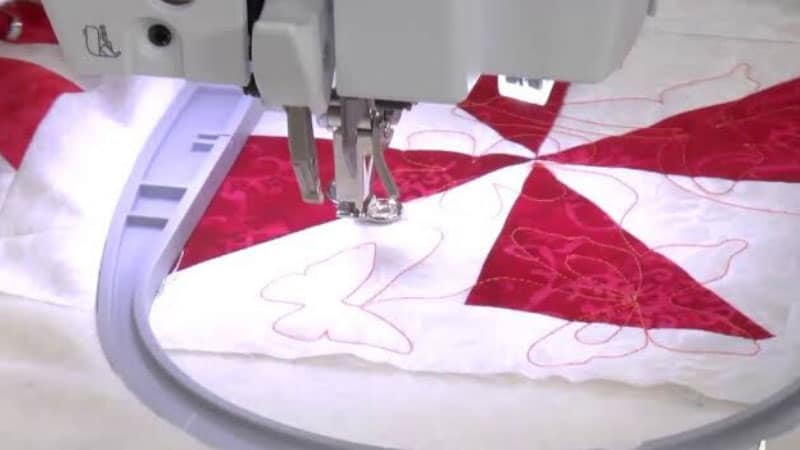
Things You'll Need to Quilt with a Sewing Machine
There are certainly some must-have quilting supplies that you are going to need to make anything that even remotely resembles a quilt. Make sure you grab each of them before starting with your machine.
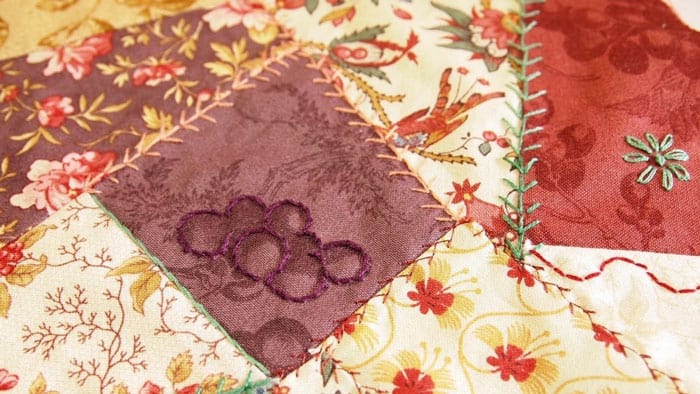
Fabric
The first and foremost thing you'll need is undoubtedly a fabric. Try to gather a stock full of cotton fabrics. If you are a beginner, then starting with cotton will help you to improvise your quilting skills, and gradually you can reach the next level of quilting, which is to quilt queen sized fabrics.
Rotary Cutter or Fabric Scissors
Secondly, you are gonna need rotary cutters and a cutter mat to prevent your surface from any splits. Rotary cutter helps you to even the edges of your fabric, detailing the design of your material and obviously cutting your fabric to its required length and width.
Rotary Cutter Ruler
A rotary cutter ruler will support your hands to maintain the proper alignment of the dragged lines. If you have a spooky hand or you often fail to make straight lines of your desired cutting areas, then a rotary cutter ruler will be your companion.
Gloves
As a matter of safety, you should be wearing gloves while pushing your quilt through the needle. Also, when you are changing the needles or using seam rippers for mending your mistakes, using gloves becomes essential!
A Pin Cushion and Pins
If you are a beginner and you barely have mastered the skill of "stuff and fluff", which means having good control over your quilt while tugging and pulling it inside out, then having a good number of pins will help you to get along with this.
You are gonna get standard pin cushions in your nearby stationery shop and quality pins as well. So basically, with the pins, you're gonna make your quilt firm, flat, and strengthened.
Tape Measure
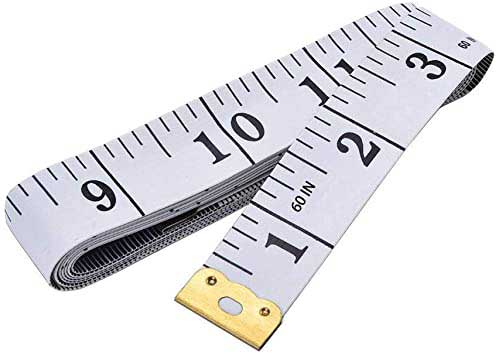
Pretty obvious that you must have a tape measure to determine the length and width of your fabric.
Threads
When it comes to threads, you have to make sure buying a variety of colorful threads to enhance your craftwork, and also before starting your project, take a few different threads, put them on the fabric, and try to figure out which one looks better on it.
If you want your threads to be apparent, then use vibrant-colored threads. And if you want your strands to look a little bland, then go for the low saturated threads.
Sticky Notes
Trust me, keeping sticky notes around your sewing machine helps you to keep track of your work, the sizes of your project, the pattern details, the design, the possible improvements everything!
You just need to note them up in your sticky note, and while working, if you feel like you are missing something, then have a glance at them. Simple!
Fabric Marker
Grab some ordinary fabric markers to drag straight lines on your fabric. Or sometimes, if you wanna stitch some patterns, then a temporary marker will help you out.
Seam Ripper
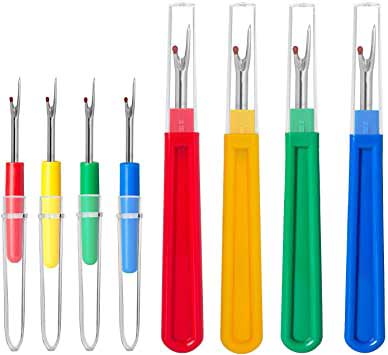
You can't really start your quilting journey without a seam ripper. It helps you to re-do your quilting if you make any mistakes.
Extra Needle
Keep extra needles for convenience as you're surely gonna need to change needles from time to time.
Quilt Batting
Lastly, quilt batting is another comprehensive tool that you can miss out on. I will suggest you have cotton battings. And for further help, batting provides a cushioning over and underneath of your quilt. It helps to get the patterns accurately, and batting also ensures the loftiness of your quilt.
So, these are the must-have tools if you are ahead of your quilting journey with a regular domestic sewing machine! Now, as you have covered all the necessary tools, let's get into the sewing method step by step.
Quilt with Your Sewing Machine - 8 Easy Steps
Alright! So I have 8 super easy steps for the beginner quilters who want a decent pay-back from their ordinary quilting machine! Herein, without taking much time, let's sink into the steps and get crafty!
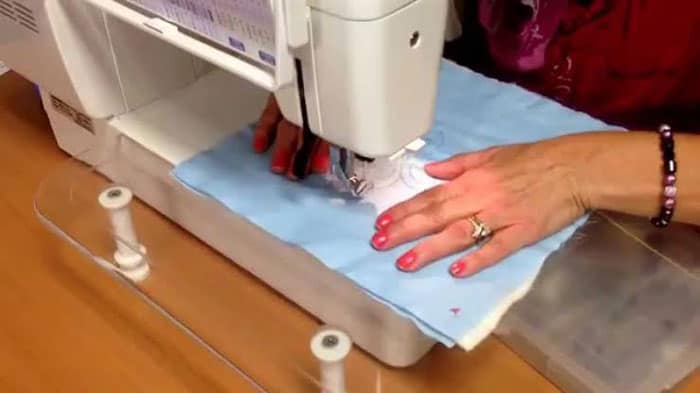
Step 1: Broad Space
Okay, so, I may sound odd or different from other potential needleworkers, but the first step for starting quilting is to get plenty of room on the backside and the side of your machine. Because you are going to push a whole quilt through the sewing machine.
And a traditional quilting machine doesn't have that much space to hold all of your quilts into that small throat. So, you'll definitely need enough space to do the "Push and Pull" thing! It will also stop the quilt from falling off the edge of the tables if you manage to place your sewing machine against the walls.
Because if the quilt falls off the edge, it will immediately pull against you, and you're gonna be like pulling and tugging constantly. Here I am pretty sure that you don't want this sort of disturbance in your first ever quilting experience.
Step 2: Small & Simple Is the Key
You're surely excited and want to mount a big quilt on your own at once, but that's not how you're gonna start. If you want to ace the traditional quilting, you need to start with small fabrics. Take a small, standard-sized fabric for your project that you will help you to remain less stressed and more focused on the quilt.
Choosing a big quilt will give you nothing but strains and a bucket full of frustration. Because as a beginner, you aren't gonna figure out the edges properly. Moreover, maintaining that grip over the big quilt utterly needs ample maneuver.
When I said to take something small, it doesn't mean something tiny, not very massive neither very small. Try to get a standard size of 30-50 inches maximum. Otherwise, the too-small fabric may stitch your fingers. Who knows?
Step 3: Nudge the Feed Dogs down!
The feed dogs are like metal-teeth ridges. If you don't know what's feed dogs are, then let me tell you that this is the set of multiple feed dogs that moves back and forth between the sloth of your quilting machine.
I am sure you have noticed that throat plate under the needle area, and from the plate-hole, the feed dogs appear when you drop the feed dogs down! Nudging your feed dogs down will help you to stop them from moving.
And it's crucial because the feed dogs are prone to take charge of driving the quilt abnormally. Hence you won't be in control anymore. So the third step is dropping your feed dogs!
Step 4: Work with Waves
If you want to start with straight-up lines on your quilt, then its fairly okay. But, if you prefer some designs on your fabric, then take your fabric marker and start with basic and simple designs.
For this, try to drag curvy lines like the river waves. It will help you to learn to stitch in a different direction. Also, you're gonna have terrific control over the stitches gradually.
Step 5: Put Your Batting Buddy Underneath
Now you need to grab the batting for cushioning your fabric. When you're shopping for battings, make sure you buy the cotton ones.
Okay, after getting the batting, measure your fabric length and width and cut the batting into the same ratio. It's important to provide cushioning and insulation to your fabric for mounting adequate texture, dimension, and loftiness.
Step 6: Play with the Pins
Almost every professional needleworker has done this "pin technique" even for once in their entire journey. The pins actually help your quilt to lay on the place. It remains flat and firm on the surface. And this is what you want, right?
Because while quilting, the extra fabric annoys a lot by coming across your machine, and you relentlessly keep pulling them and tugging them inside your lap.
So, pins or ordinary safety pins will save you from this mess. You just need to spread your fabric on the surface, then iron it for flattening, and lastly, insert the pins to death until it becomes conveniently flat and stable.
Step 7: Stuff and Fluff
Take your quilt and determine the area where you are gonna be quilting. After that, put both of your hands like a frame on the quilt and keep going along with the working foot.
And after quilting, a series of long quilting channels start from the middle of your desired length and width. Try quilting right along the seam in between two blocks. Make sure you've sewn the seam with both of the block pieces amid the batting. It makes a little ditch there, so that is why it is called stitching.
Now lift your quilt up so that the weight of the quilt isn't tugging on the machine area at all. Keep going a little bit and stop! Lift everything up and make sure the weight of the quilt isn't pulling it in the opposite direction, either. You can also flip the entire quilt up on the sewing machine to get everything flat.
Try to needle down and anchor in between your quilting process. It allows you to gain ample control over the quilt so that you are less likely to make any mistake.
Step 8: Trim All the Uneven Edges
It's the finishing touch to your quilt. After getting your quilt done, make sure you cut all the uneven edges to mount a fresh, organic, and detailed fabric. So, we are done quilting with a sewing machine.
Now let me tell you that this was the basic quilting method for the beginners. Like if you want to quilt fabric or quilt any design on your fabric with your sewing machine, then this is how you are gonna do it. There are numerous quilting methods out there.
For instance, you have a straight line quilting. Then you have "quilt the quilt" method, which stands for quilting a blanket or a baby bedding! Let's have a short trip to the straight line quilting with your sewing machine!
How to Straight Line Quilt with Your Sewing Machine
The first thing you are going to need for this is some kind of walking foot. Especially if you have thick fabrics to quilt with, then choosing quality walking foot is necessary.
Then you are gonna need a ruler, some practice battings, some practice fabrics, quilting gloves, and marker. Make sure you get a friction erasable pen or marker for dragging the lines because the lines disappear when you strike the iron on them.
Direction
After getting all the tools in your hand, head over to your sewing machine, and start the quilting process. First thing's first, take your fabric and spread it all over the table. Now, you can drag straight lines with your marker pen and using the ruler, or you can also make horizontal or vertical lines as well.
Moreover, if you have borders over your quilt, then you can also follow the border blocks and drag straight lines up and down. For straight-line quilting, you need to determine where you want your lines on the quilt. You can try dragging some wavy lines in the center of your straight lines.
After you are done with dragging the straight-lines, follow the basic quilting method I have already mentioned above! And you are done!
How to Layer a Quilt Sandwich
Even if you are new at quilting, you must know how to layer together with your quilt sandwich and how to do the back, the batting, and the top.
- Firstly, get your batting all cut into your preferable sizes.
- Take your back. Usually, your back would be a solid piece of fabric, but you can also try using scraps.
- Now, lay your back, face down to the surface, so you aren't worried about scratching.
- Take painter's tape to tape all your back down. Start from the middle then slowly move forward to the edges (both sides).
- Start on one edge, and then make sure you don't stretch the back too much. Otherwise, its gonna spring back into place. But you surely want it to be smooth and all flat without wrinkles.
- Then take your batting, which should consist of the same size as your back.
- Now smoothen it using your hand.
- After you have placed your batting on your back, take your fabric and lay it on top of them.
- Now, use bent safety pins (it's the sauce of your quilt sandwich), which helps them to seal, closed-up, and pressed up against the hard surface.
- Pin it to death as much as you can. Because using extra pins won't do any harm to your fabric; instead, it will keep your fabric in control, absolutely flat, smooth, and firm!
Voila! Now, you have your fabric all smoothen and flattened. It's all ready to get quilted with your sewing machine, and also it will be ready to behave rather than messing around!
10 Quilting Hacks Everyone Should Know

No matter if you are a beginner or a professional, here I have 10 quilting hacks exclusively lined up for you. Check them out!
- Change your needles frequently
- Try to use an 80/20 or 90/14 size needle
- Change your rotary blade and try using a 90-degree angle
- Get your seam allowance in check
- Be patient and press your fabric using an iron
- Gove your blocks a trim
- Try chain piecing- it changes your life! This saves your time by stitching multiple fabric pieces along.
- Gather the correct tools for your project
- Use cotton or low loft batting
- Follow the maintenance process of your sewing machine to increase its durability.
Final Words
Hopefully, now you can easily quilt your self-designed fabrics with a regular sewing machine.
And as I've already mentioned that this is not the end! It will surely give you an excellent head-start, but to master the quilting techniques, you need to go through a well-planned maneuver.
Be with us, and stay tuned for some new quilting hacks!
 |
 |
 |
 |
 |
 |
 |
 |

About Alice Davis
Alice is a writer who lives in the City of Long Beach. She has a husband, an exceptionally small chihuahua, and 15-pound Maine Coon. Alice got her bachelor of science in biological science from UC Berkeley. Now, she likes writing about a lot of things; including but not limited to technology reviews, science stuff, and anything food-related.
Leave a Reply
You can get FREE Gifts. Or latest Free phones here.
Disable Ad block to reveal all the info. Once done, hit a button below
 |
 |
 |
 |