How a Sewing Machine Works
by Alice Davis
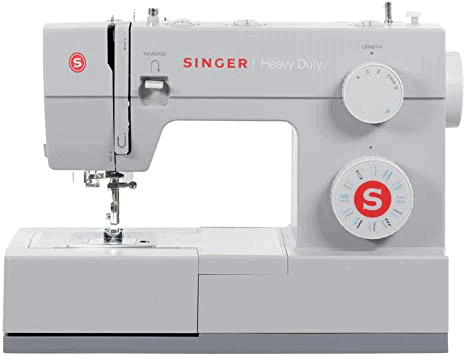
My neighbor pulled her late mother's old Singer out of storage one rainy Saturday, set it on the dining table, and stared at it like it was written in a foreign language. She'd been hand-sewing for years but had never touched a machine, and she wanted to understand exactly how a sewing machine works before she committed to using it. That question sparked one of the most satisfying conversations I've had about a piece of equipment, because once you see the elegant mechanics behind it, the whole craft clicks into place in a way it never does from just watching someone sew.
Understanding how a sewing machine works comes down to one deceptively simple idea: two threads — one from the spool on top and one from the bobbin (a small spool housed beneath the needle plate) — interlock beneath the fabric with every downstroke of the needle to create what's called a lockstitch. That interlocking action is what makes machine stitching so much stronger and faster than a hand-sewn running stitch could ever be. Browse the sewing crafts category for more in-depth guides, project ideas, and machine breakdowns that build directly on this foundation.
Contents
- Core Mechanics: Beginner Basics and How a Sewing Machine Works
- Watching the Machine Work in Real-Life Scenarios
- Five Myths About Sewing Machines, Debunked
- Mechanical vs. Computerized: A Side-by-Side Comparison
- Common Problems and How to Fix Them Fast
- Pro Tips and Tricks for Cleaner, Faster Stitching
- Your Long-Term Strategy for Keeping Your Machine Running
Core Mechanics: Beginner Basics and How a Sewing Machine Works
The mechanical process inside a sewing machine is surprisingly logical once you pull it apart into its main components, and getting a clear mental picture of those parts is what separates a confident sewer from someone who's always guessing at why something went wrong.
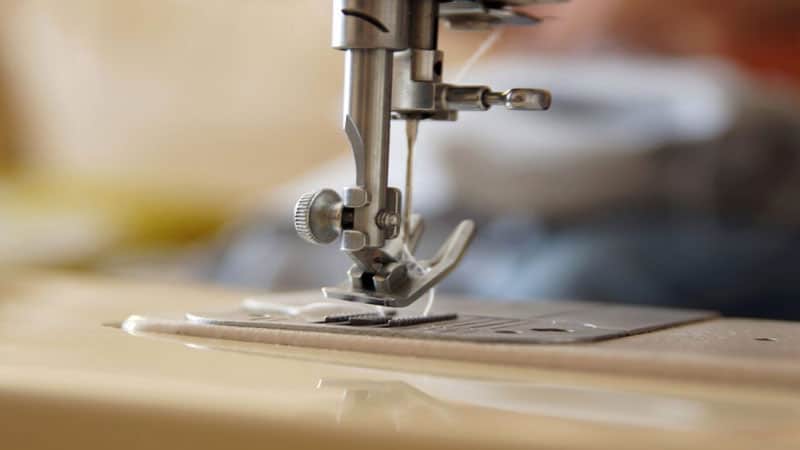
The Needle and Thread System
Your needle carries the upper thread down through the fabric on each downstroke, and the critical action actually happens in the fraction of a second just after the needle starts to rise back up. Here's the sequence in plain terms:
- The needle drives down through the fabric, pulling the upper thread with it to the underside.
- As the needle begins to rise, a small loop of thread forms just behind the needle's eye, right below the fabric surface.
- The rotating hook assembly (described below) catches that loop and swings it completely around the bobbin thread.
- The take-up lever (the moving arm on the front of the machine) pulls the upper thread back up, snugging both threads together inside the fabric layers to lock the stitch.
This entire sequence happens hundreds of times per minute at full speed, which is why a seam that would take ten minutes by hand gets done in under thirty seconds on a machine that's properly threaded and tensioned.
The Bobbin and Hook Assembly
The bobbin is the unsung hero of the whole system, sitting quietly in a small compartment below the needle plate and supplying the lower thread that completes every stitch. Two main hook systems are used in modern machines, and knowing which one yours uses helps you understand its behavior and service needs:
- Oscillating hook: Swings back and forth in a partial arc to catch the upper thread loop — common in older machines and many budget models that still work reliably for basic projects.
- Rotary hook: Spins in a full continuous circle, which produces smoother and more consistent stitches at higher speeds with less vibration and noise over time.
According to Wikipedia's article on sewing machines, the lockstitch mechanism first patented in the 1840s remains the operating foundation of virtually every modern home sewing machine, which is a testament to just how well this design solved the problem it set out to address.
Pro tip: Always wind your bobbin at a steady, medium speed — a bobbin wound too tight or too loose creates uneven thread tension from the very first stitch, and that's a problem that no amount of dial-adjusting will fully correct.
Watching the Machine Work in Real-Life Scenarios
The theory of how a sewing machine works is one thing, but watching those mechanics translate into actual fabric results — on different materials, with different stitch types — is what turns understanding into intuition you can rely on.

Straight Stitching on Different Fabrics
A straight stitch on quilting cotton is the clearest demonstration of the lockstitch in action, because you can see the evenly spaced stitches from both the top and bottom of the seam with equal clarity and no loops pulling to either side. On stretch fabrics like jersey knit, that same straight stitch will snap under tension because the thread can't flex with the fabric — that's why your machine includes a stretch stitch or small zigzag setting specifically designed to handle those materials. When you're ready to commit to a dedicated sewing space, these easy DIY sewing table plans help you build a solid, stable surface that keeps your machine level and your stitches consistent from the start.
Zigzag and Specialty Stitches in Action
The zigzag stitch works by shifting the needle position left and right with each downstroke, and that lateral movement produces the angled pattern that lets the stitch flex without breaking on woven edge finishes and stretch seams. More complex specialty stitches — buttonholes, blind hems, decorative embroidery patterns — are all variations on the same mechanical principle, just with precisely timed combinations of needle position shifts and feed dog movements producing the finished pattern. If your creative interests extend beyond fabric into craft tools like heat transfer vinyl, it's worth checking out whether you actually need a vinyl cutter for heat press work, since many sewers combine both disciplines in the same creative workspace.
Five Myths About Sewing Machines, Debunked
These misconceptions come up constantly in beginner sewing communities, and a solid grasp of how a sewing machine works mechanically puts every one of them to rest without any ambiguity or hedging.
Myths That Trip Up Beginners
- Myth: An expensive machine automatically sews better. A well-maintained $150 mechanical machine produces cleaner stitches than a neglected $800 computerized one every single time, because maintenance and correct threading matter more than price tag.
- Myth: You need to re-thread before every sewing session. You only re-thread when you change thread, when the thread breaks mid-project, or when the machine starts behaving erratically — not as a before-you-start ritual.
- Myth: The needle does all the work. The needle is one piece of a three-part system that includes the feed dogs (the teeth below the presser foot that advance the fabric) and the hook assembly, and all three need to work in sync for clean stitching to happen consistently.
Myths That Mislead Experienced Sewers
- Myth: Tension settings should never need adjustment. Different thread weights, fabric thicknesses, and stitch types all change the optimal tension setting, so adjusting it per project is completely normal behavior — not a sign that anything is malfunctioning.
- Myth: Buying refurbished is always a gamble. Many sewers get excellent long-term results from restored vintage machines, and this guide on whether a refurbished sewing machine is worth it walks through exactly what to inspect and what red flags to avoid before you commit.
Warning: Never pull your fabric forward or backward while it's under the presser foot and the needle is engaged — let the feed dogs move the fabric at their own pace, or you'll bend the needle and potentially knock the machine's timing off completely.
Mechanical vs. Computerized: A Side-by-Side Comparison
One of the first decisions you'll face when buying a machine is whether to go mechanical or computerized, and the right answer depends on what you're making, how often you sew, and how much complexity you actually want to manage at the machine.
Reading the Comparison at a Glance
| Feature | Mechanical Machine | Computerized Machine |
|---|---|---|
| Typical price range | $80–$350 | $250–$2,000+ |
| Built-in stitch count | 6–20 stitches | 50–500+ stitches |
| Control interface | Physical dials and levers | LCD screen with buttons or touchscreen |
| Maintenance complexity | Low — most tasks are user-serviceable | Moderate — electronic components need tech care |
| Ideal use case | Garments, quilting, home dec basics | Embroidery, monogramming, complex patterning |
| Estimated lifespan with care | 20–40 years | 10–20 years |
| Repair cost if serviced | Generally low | Moderate to high depending on components |
For most beginners, the mechanical machine is the smarter starting point because it teaches you the fundamentals without hiding them behind a screen, and the skills you build on a mechanical machine transfer directly to any computerized model you upgrade to later. If you're already confident with the basics and want to explore decorative embroidery or programmed buttonholes, a computerized machine unlocks possibilities that a dial-based model genuinely can't replicate.
Common Problems and How to Fix Them Fast
Even when you understand how a sewing machine works, real-world problems still show up — usually at the worst possible moment in a project — and knowing the most common causes gets you back to sewing without a lengthy troubleshooting spiral.
Thread and Tension Issues
- Thread bunching underneath the fabric (called bird's nesting): Almost always caused by improper upper threading, specifically missing the tension disc slot or threading with the presser foot lowered. Raise the foot, re-thread completely from the spool pin down, and test on a scrap.
- Loops on the top surface of your fabric: The bobbin thread tension is too loose, or the bobbin isn't seated correctly in its case. Remove the bobbin, reseat it so the thread feeds in the correct direction, and test before touching the tension dial.
- Thread snapping mid-seam: Usually a dull or bent needle, a thread knot on the spool, or forcing heavy fabric at full machine speed. Slow down on thick seams and change your needle more frequently than you think you need to.
Needle and Feed Dog Problems
- Skipped stitches: The needle is installed backward (flat side always faces the back of the machine), is the wrong type for your fabric, or is damaged. Check all three before assuming the problem is mechanical.
- Fabric refusing to advance: The feed dogs may be in the lowered position (a setting used for free-motion quilting), or lint has packed tightly around the teeth. Remove the needle plate, clean with a soft brush, and check your drop-feed switch.
- Uneven or wavy stitch length: You're likely guiding the fabric with too much hand pressure instead of letting the feed dogs control the pace, which causes the fabric to bunch and stretch slightly between each stitch.
Pro Tips and Tricks for Cleaner, Faster Stitching
These habits come from sewers who've put real hours on their machines, and they directly address the small decisions that separate stitching that just holds together from stitching that looks and performs like professional work over the long haul.
Setup Tips Before You Sew
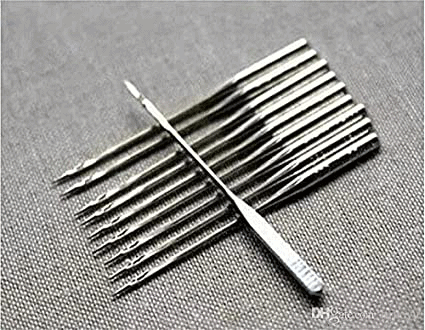
- Match your needle type to your fabric every single time — universal needles cover most woven fabrics, ballpoint needles are essential for knits, and denim or heavy canvas needs a heavy-duty needle with a thicker shaft.
- Thread your machine slowly with the presser foot raised so the tension discs open fully and accept the thread correctly, following the numbered path marked on your machine from the spool pin all the way to the needle eye.
- Always run a test seam on a scrap of your actual project fabric before starting, checking that both the top and bottom of the stitching look even with no loops pulling to either side of the fabric.
- Build a dedicated workspace with a stable, level surface so your machine doesn't vibrate out of position mid-project — these DIY sewing table plans are a practical starting point for creating a setup designed specifically around a machine's footprint and storage needs.
Mid-Project Habits That Make a Real Difference
- Backstitch (reverse stitch) at the start and end of every seam to lock the thread ends, because lockstitches don't tie themselves off and will pull out from the raw ends without this step securing them.
- Change your needle every 8–10 hours of active sewing time, or immediately if you hear a soft popping sound as the needle enters the fabric — that sound is a dull tip punching through instead of piercing cleanly.
- Lower your speed significantly when sewing through intersecting seams, around tight curves, or across thick layers — the precision you gain at slower speed is always worth more than the time you'd save rushing.
Pro insight: Keep a small, clean paintbrush next to your machine and sweep lint from the bobbin area every single time you change the bobbin — lint buildup is the single most common cause of tension inconsistencies that beginners almost always blame on threading or needle position instead.
Your Long-Term Strategy for Keeping Your Machine Running
A sewing machine that gets consistent, simple maintenance will outlast one that only gets attention when something breaks, and the tasks involved are genuinely straightforward once you build them into a routine that matches how frequently you actually sew.
A Routine Maintenance Schedule
- After every project: Remove the needle plate with a small screwdriver, brush lint from around the feed dogs and bobbin case with a dry brush, and wipe the machine's exterior surfaces with a clean, dry cloth.
- Every 8–10 hours of sewing: Apply one drop of sewing machine oil to each designated lubrication point marked in your manual (never use WD-40 or general household oil), replace the needle, and clean the bobbin case thoroughly.
- Once a year: Have a qualified technician perform a full service including timing verification, tension calibration, and internal cleaning — especially critical if you sew heavy materials regularly or use your machine for long daily sessions.
Building your skills alongside your maintenance habits is one of the best investments you can make in the craft, and keeping a solid reference on your workstation makes a real difference in how quickly you progress — these sewing books for beginners cover machine mechanics, construction techniques, and pattern reading in clear, accessible language. And if your creative interests stretch beyond fabric into other craft tools, there's meaningful overlap in how these machines operate — see what equipment a heat press sock business actually requires to understand how craft machine categories share core mechanical principles worth knowing.
When to Seek Professional Help
- Your machine produces a grinding, clunking, or rattling noise that wasn't there before — this usually points to a timing issue or damaged hook assembly that no home fix will address properly.
- Tension adjustments stop producing consistent results even after careful and complete re-threading, which typically means the tension assembly itself needs professional recalibration rather than user adjustment.
- The handwheel feels stiff, catches, or resists turning, which can signal a mechanical obstruction, a lubrication failure, or a broken component deep inside the machine body that requires disassembly to access and fix safely.
Frequently Asked Questions
How exactly does a sewing machine form a stitch?
The needle carries the upper thread down through the fabric, and as it rises slightly, a small loop forms below the fabric surface. The hook assembly catches that loop, wraps it around the bobbin thread, and the take-up lever pulls everything tight — locking the two threads together inside the fabric layers to form a single stitch. This cycle repeats hundreds of times per minute.
What is the difference between the bobbin and the spool?
The spool is the large thread source that sits on top of your machine and supplies the upper thread. The bobbin is a much smaller spool that loads into a compartment below the needle plate and supplies the lower thread. Both threads are required for every stitch — the machine uses one from above and one from below to create the lockstitch.
Why does my thread keep bunching up under the fabric?
This problem — called bird's nesting — is almost always caused by incorrect upper threading, specifically threading the machine with the presser foot in the lowered position, which keeps the tension discs closed and prevents the thread from seating properly. Raise the presser foot, re-thread your upper thread completely from scratch, and test on a fabric scrap before returning to your project.
How often should I oil my sewing machine?
Most machines benefit from a drop of dedicated sewing machine oil at each lubrication point approximately every 8–10 hours of active sewing, or monthly if you sew regularly. Always consult your machine's manual to locate the correct points, since some modern computerized machines are self-lubricating and should not be oiled by the user at all.
Can I use any sewing machine needle in any machine?
Home sewing machine needles are largely standardized and fit most domestic machines, but the type of needle matters enormously for the fabric you're sewing. Universal needles work on most wovens, ballpoint needles are designed for knits, and heavy-duty needles handle denim and thick canvas. Using the wrong needle type is one of the most common causes of skipped stitches and thread breakage.
What does "tension" mean on a sewing machine, and how do I know if it's set correctly?
Tension refers to how tightly the machine pulls both the upper and lower threads as it forms each stitch. Correct tension produces stitches that look identical on both the top and bottom of the fabric with no loops pulling to either side. If loops appear on the top, the upper tension is too loose; if they appear on the bottom, the upper tension is too tight. Start adjustments from the upper tension dial in small increments and always test on a fabric scrap first.
Next Steps
- Thread your machine from scratch right now with the presser foot raised, following every guide point in sequence, and run a test seam on a fabric scrap to confirm that both the top and bottom stitching look even before you start your next real project.
- Remove your needle plate today, brush out the lint from around your feed dogs and bobbin case, and check whether your current needle is due for a replacement based on when you last changed it.
- Test your tension setting on three different fabric types you use regularly — thin cotton, stretch knit, and a heavier woven — and write down which tension dial position produces the cleanest stitch on each so you're not guessing next time.
- Pick up one of the recommended beginner sewing books that covers machine mechanics and garment construction together, so you're building your understanding of how the machine works alongside your practical project skills at the same time.
- Schedule a professional service for your machine if it's been more than a year since its last tune-up, especially before starting any large project — a freshly timed and lubricated machine will make every step of the process noticeably smoother and more consistent.


About Alice Davis
Alice Davis is a crafts educator and DIY enthusiast based in Long Beach, California. She spent six years teaching textile design and applied arts at a community college, where she introduced students to everything from basic sewing techniques to vinyl cutting machines and heat press printing as practical, production-ready tools. That classroom experience means she has put more sewing machines, embroidery setups, Cricut systems, and heat press units through real project work than most reviewers ever will. At PalmGear, she covers sewing machines and embroidery tools, vinyl cutters, heat press gear, Cricut accessories, and T-shirt printing guides.
You can get FREE Gifts. Or latest Free phones here.
Disable Ad block to reveal all the info. Once done, hit a button below