10 DIY Sewing Table Plans That Are Very Easy to Follow!
by Alice Davis
A desk for sewing is an essential piece of furniture for anyone who loves crafting, both as a hobby and a side job during spare time.
But if buying a sewing table is a bit expensive for your budget, then just follow the instructions given in this article to help you create the perfect sewing table for your ideal crafting needs.
These DIY tables can provide you with spaces with specific purposes, including multiple storage areas embedded into the table itself, so you can find the right place to fit your sewing machine alongside crafting materials.
Some of these tables are also portable, which comes with caster wheels to help you easily maneuver the furniture.
Shuffle through the list to find the perfect table that accommodates your dedicated aesthetic and crafting creations!
Contents
- 10 DIY Sewing Table Plans That Are Very Easy to Follow!
- The Wood Table Side Cubby Sewing and Crafts Table
- Cubby Storage Sewing Table for Small Spaces
- Large Sewing and Quilting Desk
- Extra Long and Wide Needlework Table Project
- The Decorated Sewing and Crafting Table Build
- Slim Collapsible Crafting and Sewing Table Build
- Sewing and Craft Table Combination
- Home-Made IKEA Sewing Table
- Custom Storage DIY Sewing Table
- Minimalist Sewing Desk
- Warnings
- Conclusion
- Related posts
10 DIY Sewing Table Plans That Are Very Easy to Follow!

1. The Wood Table Side Cubby Sewing and Crafts Table
If you're looking for a large surface area with a multifunctional side cubby for your various crafting needs, this item perfectly fits the criteria.
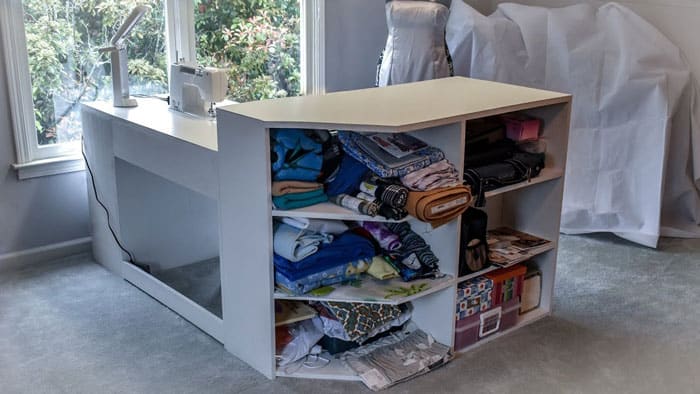
This project is perfect for beginners, but cutting and sanding the wood pieces might be a challenge. So, we recommend including another pair of hands to finish the desired product with perfection.
Tools You'll Need
- Hammer
- Safety glasses
- Drill
- Circular saw
- Sander
- Tape measure
- Speed square
- Kreg jig
- Ear protection
- Pencil
Things to Buy
- 1 sheet of solid pine or A
- 1 Plywood
- 2 of 15" drawer slides
- 1 of 1/4" pocket hole screws
- 2-inch screws1 of 1/4"-inch screws
- Wood glue
- 120 grit sandpaper
- Primer
- Wood filler
- Paint
- Paintbrush
Woodcuts
- 1 of 3/4″ MDF or A1 at 55″ x 38″ (top)
- 2 of 1×4 at 31 1/2″ (sides of drawer housing)
- 1 of 1×4 at 28″ (center of drawer housing)
- 2 of 3/4″ MDF or A1 plywood at 25 1/2″ x 14 1/4″
- 2 of 1×4 at 25 1/2″ (backs of drawers)
- 4 of 1×4 at 15″ (sides of drawers)
- 2 of 1×4 at 29 1/2″ (measure to fit, drawer face)
Instructions
Below provided is a step-by-step process to craft your own simple, multipurpose, and stylish sewing table project.
Step 1
Measure and mark the midpoint of each side of the drawer housing (31 ½ inches) to fasten the center plywood to the marked sides. Use two-inch screws and wood glue to put the center in place, which is 28 inches in length.
Countersink and predrill the screws before setting the center in place. Make sure to measure the midpoint accurately, as the drawers will not slide out properly if the middle portion isn't perfectly square.
Step 2
Place the drawer housing (1×4 boards) on the center of the tabletop plywood, and make sure to set it perfectly square. Countersink and predrill two inches deep into the four sides of the drawer housing, and one in the center.
Using your two-inch screws on the top of the drawer housing (1×4 boards), hide any screws from appearing on the tabletop.
Step 3
Fasten the drawer back (25 ½ inches) to the base of the drawer (25 1/2″ x 14 1/4″), using two-inch screws and glue.
Step 4
Using the glue to fasten the sides (15 inches) of the drawer to the base. Do this on both sides of the base.
Step 5
The face of the drawer (29 1/2 inches) should meet the center from both sides of the drawer. Fasten the face of the drawer to the sides, make sure both sides are in the center-face of the drawer and glue it into place.
Subtract ¼ inch from the outsides of the face of the drawer to perfectly align the sides of the drawer to the face.
Step 6
Fasten the top of both of bookshelves to tabletop sides. Countersink and predrill 1 1/4 inches screws on the insides of the drawer housing to the back of the shelves.
Use screws on four sides and the top two inches of the drawer housing to ensure that the cubby supports the drawers.
Step 7
Insert the drawers into both sides of the drawer housing, and glue handles onto the drawers if you wish to add a bit more flair to your project.
Step 8
Sand thoroughly and use primer on the tabletop to help you evenly paint the table to your liking.
Warnings
- Do not use wood glue to fasten the bookshelves to the drawer housing, and the support can come apart easily.
- Do not use wood glue to fasten the bookshelves to the drawer housing, and the support can come apart easily.Make sure to measure using your speed square in the center for both the drawers and the drawer housing.
- Work on a clean surface level.
2. Cubby Storage Sewing Table for Small Spaces
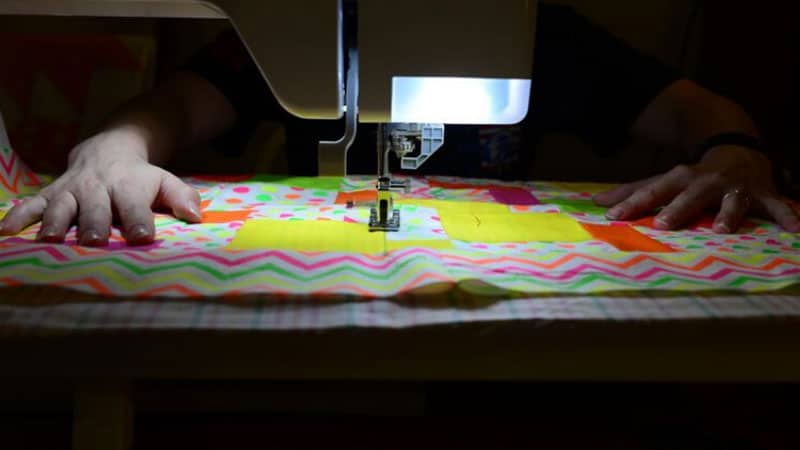
If portability and easy storage are what you're searching for, then this project is exactly what you need.
This project is the perfect fit for anyone looking to take up sewing or crafting for a hobby, as you can maneuver and neatly tuck away this expanding layout tabletop.
It also comes with a cubby to hold your sewing machine and keep your crafting space free of any mess. Anytime you want to work on your sewing skills, just take out this table from your closet and unfold it on your favorite corner of the room and get to crafting!
Tools You'll Need
- Hammer
- Safety glasses
- Drill
- Circular saw
- Sander
- Tape measure
- Speed square
- Drill bit setPencil
Things to Buy
- 1 sheet of solid plywood
- 2 of 1x2s or 1x3s
- 4 of 2″ caster wheels
- 2 of 1/2″ screws
- Primer
- Wood conditioner
- Wood filler
- Sets of hinges (5 sets)
- Wood glue
- 120 grit sandpaper
- Paint
- Paintbrush
Woodcuts
- 1 of 1×32 at 15 1/2″ (top)
- 2 of 1×32 at 26 3/4″ (sides)
- 2 of 1×32 at 12″ (shelves)
- 2 of 1×32″ at 20″ (leaves)
- 4 of 1x2s at 29 1/4″ (measured legs)
Instructions
Although taking on this project might seem easier than the rest, ensuring the right measurements for the wood and the placement can make or break the whole attempt. So, be extra careful with the measurements.
Step 1
If you're cutting the plywood by yourself, remember to take proper safety measures and consider the width of your circular saw.
Cut two pieces for the sides 26 ¾ inches in width and 32 inches in length. Also, cut two for the leaf 12 inches in width and 32 inches in length. Separate four pieces for the shelf 15 ½ inches in width and 32 inches in length.
Step 2
Build the core box using 2 ½ inches screws by countersinking and predrilling them. With the top being 15 ½ inches, make sure the top overhangs on both sides.
Glue and screw both sides (26 ¾ inches) to the shelves (12 inches) and adjust the height of the middle shelf according to the size of the sewing machine.
Step 3
Screw the 4/2 inches caster wheels with a clearance of 2 1/2 inches on all four sides of the underside of the table. Measure the top of the table to the bottom of the wheel, which will be the new length of your table.
Step 4
Turn the table face down on the floor and fasten the leaves on the top overhangs on both sides with 3 hinges on each side.
Step 5
Add the legs (29 ¼ inches) on the outside corners of the leaves, parallel to each other using hinges, so they can be folded open to hold the extendable leaves in place.
Step 6
Turn the table face up, sand the top of the table, and the leaves in order to properly apply any furnish or paint of your choice.
Warnings
- Make sure your caster wheels have a total clearance of 2 1/2 inches.
- Take proper safety precautions while cutting the sheets of wood.
- Drill the hinges tightly in place to keep the extendable leaves stable while you work on your crafts.
3. Large Sewing and Quilting Desk
Do you love making quilts but hate working with the fabric on the floor or uneven surfaces?
You can just take matters into your own hands and create a sewing and quilting table with a large surface area to accommodate any and all of your crafting supplies!
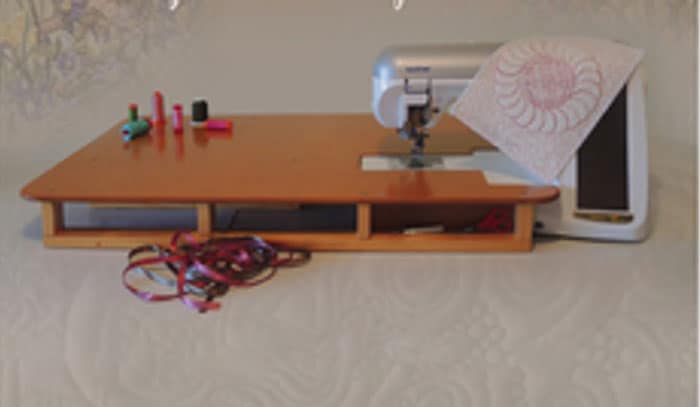
Although this certainly isn't a project for the beginners, with the multifaceted qualities that this table comes with, this project will certainly be worth your time and effort!
Tools You'll Need
- Safety glasses
- Drill
- Circular saw
- Sander
- Tape measure
- Speed square
- Kreg Jig
- Ear protection
- Pencil
Things to Buy
- 4 Large dining table legs
- 1 of 1×3 @ 8 feet long
- 2 of 1×4 @ 8 feet long
- 4 of 1×10 boards @ 8 feet long
- 1 of 1/4″ pocket hole screws
- 120 grit sandpaper
- Wood glue
- Wood filler
Woodcuts
- 2 of 1×4 at 24 1/2″
- 2 of 1×4 at 66″
- 2 of 1×3 at 30 1/2″
- 4 of 1×10 at 78″
Instructions
Always predrill holes before attaching the screws and find a large clean surface area to work on, as this project will take up a lot of space.
Step 1
Measure and create the tabletop first, which should be 38 inches in width and 78 inches in length. Use four or more (if needed) boards that equal to 38 inches and glue them together using wood glue and set it aside.
Step 2
Attach the two wood boards (24 ½ inches) to the top of two of the dining table legs, by creating pocket holes using a Kreg Jig. And inserting two pocket hole screws (1/4 inches) on each side of the wood boards to attach them to the table legs.
Follow this procedure for both ends of the dining table legs and build your end aprons.
Step 3
Similar to the last step, attach the 66 inches side wood boards to the end aprons using pocket hole screws (1/4 inches) and create a basic structure for the table.
Step 4
Add three middle supports to the basic structure, with a 24 ½ inches gap between each of the wood boards. Again, fasten these supports using pocket hole screws (1/4 inches) on both ends of the boards to the side aprons.
Step 5
Place the tabletop on the structure of the table once the glue is dried. Make sure the tabletop overhangs on all sides for better middle support.
Step 6
Cover the holes with wood fillers and dry them before adding supplementary wood filler coatings. Sand the workpiece with sandpaper of about 120 grit. This is to help apply the paint or furnish of your choice evenly on the entire surface area of the table.
Warnings
- Follow the measurements for cutting the wood, as precisely as possible.
- Apply wood glue on the screws to create a stronger hold.
- Remember to wipe the excess glue before applying the finish.
4. Extra Long and Wide Needlework Table Project
It's hard to find a large sewing table to accommodate your craft room without breaking the bank! You'll not only be able to make a table to fit the exact measurement of your crafting room but also create a hole to fit your sewing machine by supporting the bottom and keep the machine leveled with the surface.
This project is exactly two feet wide, with an apt amount of space underneath the table to store your sewing and crafting supplies.
Tools You'll Need
- Drill
- Circular saw
- Sander
- Tape measure
- Speed square
- Brad nailer
- Ear protection
- Pencil
- Safety glasses
- Jigsaw blade
Things to Buy
- Wood glue
- Wood filler
- 1 of 1/4″ and 2″ finish nails
- 2 1/2″ wood screws (20 screws)
- 2″ wood screws (100 screws)
- 4 of 1×8 boards, 8′ in length
- 1 of 1×4 board, 10′ in length
- 2 of 2×2 boards, 8′ in length
- 2 of 1×3 boards, 8′ in length
- 2 of 1×6 boards, 10′ in length
- Sandpaper
- Finishing supplies
Woodcuts
- 4 of 1×3 at 29 1/4″ (table end legs)
- 4 of 1×4 at 29 1/4″ (table side legs)
- 2 of 1×6 at 88″ (side aprons)
- 2 of 1×6 at 23 3/4″ (end aprons)
- 2 of 1×3 at 23 3/4″ (end stretcher)
- 8 of 2×2 at 23 3/4″ (tabletop supports)
- 1 of 2×4 (base plank)
Instructions
This project can be customizable to fit the measurements of your craft room, so you can adjust this table to accommodate your specific needs.
Step 1
Reduce the thickness of the table end legs, as the dimensions of the legs are to be wider than the bottom. Taper all four of the leg pieces in a straight line.
Start the tapering 5 ½ inches down from the top and reduce 1 inch from the spot you tapered from to the bottom, leaving 1 ½ inch of width narrower at the foot of the table.
Make sure the top (5 ½ inches) of the leg is 2 ½ inches, and the bottom is 1 ½ inch and do this to the end of the tabletop legs.
Step 2
Taper the side of the legs in a similar fashion. However, the side legs should be wider than the end legs. So, the top of the leg should be 3 ½ inches, and it should be narrowed down 1 inch to the bottom in a straight line, making the foot 2 1/2 inches in width.
Narrow down from 5 1/2 inches from the top, so the tapered portion should be 23 ½ inches in length.
Step 3
Assemble your side legs to the end legs in 1×4 for all four legs, using wood glue. Also, keep the position of your tabletop in mind while putting them together. Keep 1×3 cuts for the ends and 1×4 cuts for the sides of the table.
Step 4
Attach the side apron (88 inches) to two of the legs on each side, using at least five nails on the inside corner of the side legs. Fasten it further by adding two three-inch nails on the outside of the side legs to the edges of the side apron.
Strengthen the support of the side apron by adding 1 ¼ inch screws and glue on the inside corner of the side legs. Repeat this process for all four legs and fasten both the side aprons.
Step 5
Put together the side aprons, now with the tabletop legs with the 23 ¾ inches end aprons (1×6) in the edge of both of the side aprons.
Apply glue. Insert two-inch nails on the end edges of the aprons from the outside. Then, apply five (1 ¼ inch) nails and glue on the inside corner of the end apron to the end legs. This end apron should be placed at the top two corners of the tabletop legs. Repeat the same process on the opposite end.
Similarly, attach the bottom stretcher (1×3) using at least four (1 ¼ inch) nails and glue. And fasten it ten inches from the ground.
Step 6
Attach 8 tabletop supports (23 ¾ inches) inside the basic structure, each 9 ½ inches apart from each other. Fasten all of them on both sides with two-inch nails and glue on the outside of both the side aprons.
Step 7
Use four or more (if needed) wood planks and align them on the basic structure you've crafted. Find the center of the table and place the planks from the center out.
Do not fasten the center planks before aligning the planks on both sides. Predrill and countersink 2 ½ inches screws to attach the planks together. Fasten two screws on each plank by making a line 4 3/8 inches inner way from the end overhang.
Step 8
Secure the tabletop supports from the underside by predrilling and countersinking two-inch long screws from the surface of the supports to the tabletop. Use two screws per tabletop, so you'll need eight screws per tabletop support.
Step 9
Trace the bottom of your sewing machine (1/4 inch around the base) on the tabletop, anywhere you wish to place your machine.
Drill a hole into a corner of your tracing and use your jigsaw blade to cut into the tracing. Be careful when cutting through the tabletop supports. Sand the edges of the cut and save the wood scraps. Before cutting, check if there is enough space in the gap for both your machine and the cords.
Step 10
Measure the bottom of your sewing table to the bottom of your machine. Based on the assessment, determine the depth the hole needs to be and take the thickness of the tabletop into account.
Step 11
Predrill and countersink the pieces of wood according to the measurement into the tabletop supports.
Use at least two (1 ¼ inch) nails and glue to stack your base plank (2×4) across the gap. Check the fitting of your sewing machine.
Warnings
- Make sure to measure your sewing machine and your craft room space carefully.
- Dry fit each support before securing your nails and glue.
5. The Decorated Sewing and Crafting Table Build
Just because all the stylish sewing furniture won't accommodate your budget doesn't mean you can't have an aesthetic sewing table for your crafting room!
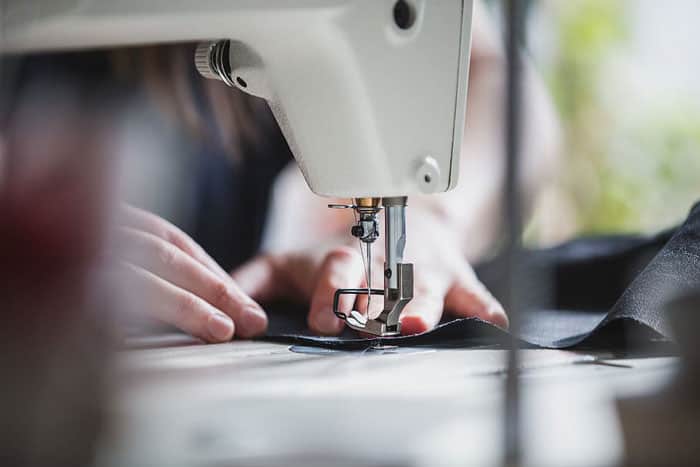
This project is great because you can also use the desk as a fabric cutting table as there is plenty of space for storing crafting and sewing items. Also, there is a cut drop in the worktop for your sewing machine to take up less place for your machine, and you can work with more ease.
Make sure that the table height matches your own, and your sewing machine or sewing pedals might be difficult to reach.
Tools You'll Need
- Drill
- Sander
- Tape measure
- Speed square
- Ear protection
- Pencil
- Safety glasses
Things to Buy
- 1 sheet of 3/4″ plywood
- 2″ screws or 1 1/4″ screws, for pocket holes
- 1 of 12′ 1×10 (small bookshelf sides)
- 7 of 8′ 1×2
- 1 of 12′ 1×12 (ends, dividers)
- Wood Glue
- 3 of 8′ 1×12 (two large shelves and one bottom)
- Finishing supplies
- 2 of 8′ 2×2
- 2″ finish nails
Woodcuts
- 2 of 1×12 at 37 1/4″ (bookshelf tops)
- 2 of 1×12 at 36 1/2″ (bookshelf bottom)
- 4 of 1×10 at 34 1/4″ (small bookshelf sides)
- 2 of 1×12 at 33 1/2″ (bookshelf ends)
- 4 of 1×2 at 13″ (small shelf top and bottom trim)
- 4 of 1×12 at 8 3/4″ (small shelves)
- 2 of 1×12 at 32″ (bookshelf divider)
- 1 of 2×4 (base plank)
- 8 of 1×2 at 31 1/4″ (end trim)
- 4 of 1×12 at 27″ (large shelves)
- 4 of 1×2 at 36 1/2″ (floating base sides)
- 8 of 1×2 at 27 3/4″ (large shelf side trim)
- 4 of 2×2 at 36 1/2″ (floating base sides)
- 4 of 2×2 at 8 1/2″ (floating base ends)
- 4 of 2×2 at 10″ (floating base ends)
Instructions
Make the central boxes for the two side shelves beforehand. Predrill and countersink your screws beforehand and measure the boards as accurately as possible before putting it together.
Step 1
Attach the top (37 1/4 inches) to the end sideboard (33 inches) and the front sideboard (32 inches), and make sure that the end sideboard is 8 3/4 inches inward from the top of the table.
Also, see that the end board overhangs with a 3/4 inch gap underneath. Fasten the shelves (27 inches) in the middle of the front and end sideboard with a 10 1/2 inches gap from the top and 10 inches gaps for the middle and the bottom.
Fasten the bottom (36 1/2 inches) to the edge of the front sideboard and the leave 3/4 inch gap underneath. Attach the end sideboard, effectively making the end sideboard reach the foot of the shelves. Use two-inch screws to attach these pieces together.
Step 2
Fasten the two bookshelf sides (34 ¼ inches) to both sides of the 8 3/4 inches inward gap you left from the top and the bottom of the table, again leaving 3/4 inch of a gap underneath from both sides.
Step 3
Put the two shelves (8 3/4 inches) in between the two sides, leaving 10 ½ inches gap from the top and 10-inch gaps for the other shelf as well as for the bottom storage. Use glue and finish nails to secure the shelves in place.
Step 4
Now, add the shelf trims (27 3/4 inches) to the side from the corner of the front shelves to the end sideboards. Now, Fill in the ¾ inch gap you left underneath with two-inch finish nails and glue.
Step 5
Fix the end trims (31 ¼ inches) to the sides of the end sideboards, using glue and finish nails.
Step 6
Use pocket hole screws to attach the shelf top and the bottom trim (13 inches) to the front small shelf, along the bookshelf top and bottom. And fasten the side trim to both sides (lengthwise) of the front shelves using glue and finish nails.
Step 7
Similar to the last step, fasten the base sides (36 ½ inches) to the lower portion of the bookshelf. Repeat the step with the floating base ends (8 ½ inches) to both the ends of the sides of the base. Use two-inch screws to finish this process.
Step 8
Add four base ends (10 inches) to the bottom of the horizontal top part of the table, according to where you want your shelves to be located, leaving 1 ½ inch gap from the side corner and ¾ inch gap from the front and the back.
Follow the last step and add the base sides to the base ends, and make sure you trace the shape of the bookshelves' top in order to properly screw in the tabletop.
Step 9
Screw-in (using two-inch screws) the tabletop from underneath, into the tabletop floating base to keep the screws from showing on top.
Step 10
Make a sewing machine drop by tracing the bottom of your sewing machine, Jigsaw blade to cut into the tracing, and sand the edges. Measure the bottom of the machine and assess the depth of the machine drop. Cut pieces of wood into the length of the sides of the drop.
Use nails and glue on the sides from the bottom of the cutout and attach the base plank (2×4) across the gap. Also, use at least two (1 ¼ inch) nails on both sides to secure the base into place.
Warnings
- Adjust the measurement or height of the table according to your height.
- Take the codes of the machine into account before cutting for the machine drop.
- Dry fit the shelves and tabletop before securing it into place.
6. Slim Collapsible Crafting and Sewing Table Build
If you have a tiny space to do all of your sewing and crafting, and a small surface area and tiny storage that keeps you from reaching your full creative capacity, this project is exactly what you're looking for!
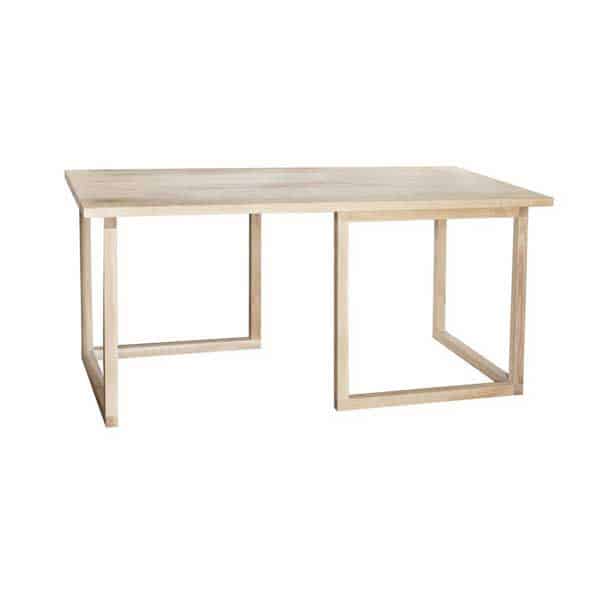
Although it can be used for most crafting and sewing, this can be used for pretty much any other type of work. As it can be convenient, portable, and sturdy, you can use this project for your everyday use even.
Tools You'll Need
- Sander
- Tape measure
- Speed square
- Ear protection
- Pencil
- Safety glasses
- Drill
- Circular saw
Things to Buy
- 1 of 2x6x4 board
- 3/8" dowel
- 2 of 4×8 sheets of 3/4 inch plywood
- 8 of 3-inch hinges
- 4 of 2x4x8 boards
- 3 of 1x4x8 board
- Glue, nails, and screws
Woodcuts
- 6 of 2×4 at 3'1″
- 1 of 1×4 at 4′
- 3 of 1×4 at 3'2″
- 2 of 1×4 at 4′ (lengthwise)
- 2 of 2×6 at 18″ (legs)
- 2 of 1×4 at 3'10" (tabletops)
Instructions
This project is extremely simple to craft, but the measurements must be suited to your exact needs, so make sure to take the right dimensions.
Step 1
Attach the two 2×4 legs (3'1"), using the 2×6 boards two inches from the bottom on each side (3'1"), and fastening it using two-inch finish nails and glue on both sides.
Step 2
In the same way, take the 1×6 boards, each 3'2", and place them on the top. Make sure they are fastened, as this will effectively emulate the shape of a thin box.
Step 3
Add the 1×4 trim board on top (4') and cover the middle gap. Make sure it overhangs at least one inch on each side and attach the 3'10" inch tall tabletops by fitting two hinges on each side on the overhangs.
Fasten a small dowel on each corner and drill two holes according to the measurements on each side of the trim board.
Step 4
On the outside corners, add the legs (18"). Attach the hinges inside the underneath portion of the tabletop. This is so that the legs can fold inwards.
Follow this procedure for all two legs on both sides. And attach the 1×4 of trims (4") on both sides of the extendable table. Fasten them right underneath the tabletop overhang, along the sides of the foldable legs.
Warnings
- You can add tapers to the bottom of both sides of the initial box for further support.
- The dowel is used in order to use the middle of the table as a hidden storage unit for your crafting materials.
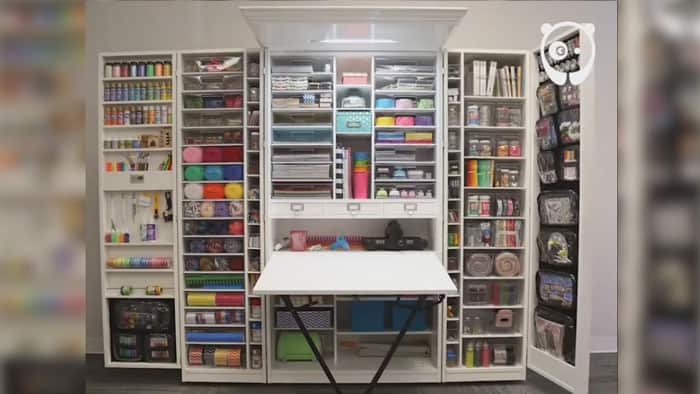
7. Sewing and Craft Table Combination
Sometimes you need to have two important things together for better ease of access. Combining a craft table with a sewing table not only saves space in the house but also makes your sewing work much faster.
Tools You'll Need
- Drill
- Table saw
- Miter saw
- Screwdriver
- Pocket hole jig
- Router
- Ripping blade
- Crosscut blade
- Band saw blades
- Plywood blade
Things to Buy
- 3/4" plywood
- 1/8" melamine
- Pocket screws
- Wood glue
Instructions
Use the table saw to cut down as much as plywood as possible. Keep in mind the finished product will be two inches long and four inches wide. The sewing table should be thirty inches in height, while the craft table is preferred to be a bit taller at thirty-six inches.
Step 1
Using a pocket hole jig, drill some pocket holes in the cut plywood pieces. It is best to keep the pocket holes on the bottom of the overall piece, so they cannot be easily seen at first glance.
Step 2
Start with the craft table. Build it upside down, since it's easier to screw the finished parts together that way. At first, attach the sides to the top.
Step 3
Add the necessary internal vertical supports. Then add the shelves. Keep space between these parts if your pieces are pre-cut before assembly.
Step 4
Now for the sewing table. It is best to build this upside down, as well. Build the side cubbies first. Move on to the other side, follow up with the back braces.
Step 5
The final part of the sewing table will include a box that should be placed under the tabletop. This is meant to create extra space for the sewing machine.
Step 6
While you can start laminating now, many prefer to paint at this stage too. A bright color should suit the final piece just fine.
Step 7
Now you can start laminating the melamine. The preferable position is the top, and you can use regular wood glue to accomplish this.
Step 8
While laminating, use clamps or weight to hold the overall piece in place, at least until the glue hardens. Be sure to cut the melamine a bit larger than the intended size, in case a mistake occurs.
In case of oversized melamine, use a flush-trim bit in a router to flush it up, but only after the glue has hardened.
Step 9
Now for the sewing machine recess, which should be cut out. The easiest way to approach this is to mark the top portion, where you intend the sewing machine box to be. Tape that area to reduce tearing of the melamine on that portion.
Step 10
Use a drill to place holes, then use an oscillating tool to roughen the hole. And use the flush trim bit in the router to finish off again.
Warnings
Keep in mind that since you're building this upside down, a lot of the steps seem to go in the backward order. So, don't accidentally build the cubbies on the wrong side.
8. Home-Made IKEA Sewing Table
No need to go out to buy a whole sewing table set. Just buy some essential
, shelving units, and tools, and you can make fabulous sewing units right in your own home.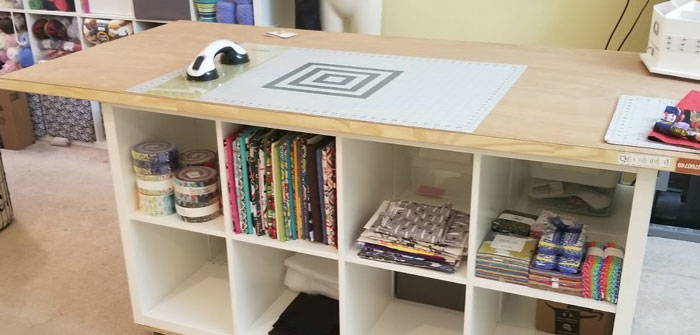
Things to Buy
- 2 of 2 x 4 Ikea Kallax units
- Screwdriver
- Drill
- Plywood blade
Woodcuts
- 1 of 3/4 inch thick plywood, cut down to 30-3/4"x 57 7/8"
- 1 of 36 x 80 hollow door
- 4 of 3-inch caster wheels with brakes
- 1 of 3-inch caster wheel without a brake
- 20 screws to screw in wheels
Instructions
After assembling the shelving units based on their given instructions, start cutting the plywood to the measurements above.
Step 1
Screw-in the wheels to the plywood (30 3/4 x 57 7/8), ensuring the screws are no bigger than 3/4 inches. The first four wheels should go to each corner. And the final wheel, the one without a break, should be attached to the center.
Step 2
Now start cutting the shelf liner sheets, then place the plywood on each end.
Step 3
Go back to the shelving units. Ensure they are both on the plywood and stuck against each other.
Step 4
Start cutting more shelf liner sheets. Place each sheet on each end of the shelving units. And place one sheet on the center.
Step 5
Finally, place the door on the shelving unit. You are free to stain the door afterward, but it's not recommended.
Warnings
Assemble and cut the plywood according to your specific needs, or the needs of your crafting room.
9. Custom Storage DIY Sewing Table
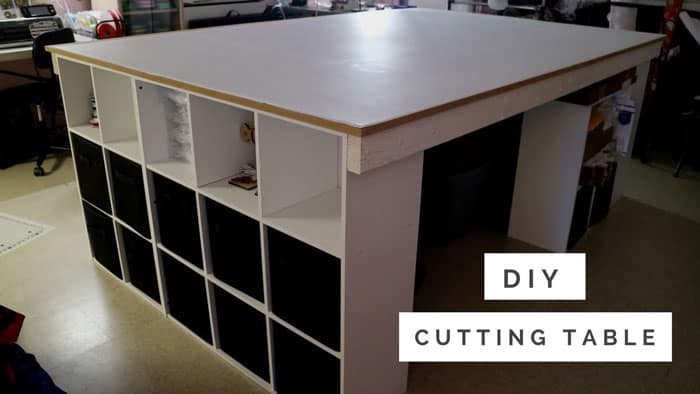
We all know the hassle of the lack of space in our homes. Sometimes, there just isn't enough space to accommodate our growing list of needs and wants. So for homeowners out there struggling to find space, especially in their sewing table units, this might be the DIY project for you.
Tools You'll Need
- A band saw/circular saw/hand saw
- Well-sharpened plane
- Router (preferably 12 mm straight bit)
- Measuring tape
- Ruler
- Hammer
- Clamps
- Masking tape
- Painting tools (brush, tray, roller)Wood glue
- Wood glue and washers
- Sanding block and sandpaper (preferably 240 grit)
Woodcuts
- 25 mm MDF
- 18 mm MDF/plywood
- 3 mm hardboard
- 5 x 12 mm dadoes
- 2 of IKEA Gerton tabletops, each 1550 x 750 mm
- 4 cupboard inserts
- 2 drawer inserts
Instructions
Since there are a lot of items for such a large table, keeping the measurements in mind while cutting is the obvious first step. Prepare the woodcut according to the instructions above.
Step 1
Cut panels on the upright portion. This is where the shelves will be inserted. When doing this, ensure that the sides of the units look identical, especially on the inside. This is important to ensure a rigid final structure.
Step 2
Insert wooden dowels (preferably 6 mm each) into each corner of each unit. Make a little jig and drill two holes on the bottom edges of the upright portion, and then into the base pieces' corners.
Step 3
Use the jig to drill into the base pieces. Similar to the bottom edges, the base pieces also need two holes on each side. Hammer the panels down onto the drilled holes.
Step 4
Use the sanding equipment to carefully sand the surfaces of the product thus far, especially the edges. You can also choose to cover the dowels with masking tape and paint the inside surfaces.
Step 5
Fasten 4 wood screws into the base of each unit. This should secure the upright portion.
Step 6
Now, assemble what you have so far. Put the shelves into the panels, and the upright portions into the dowels.
Use glue to connect the shelf edges that are attached to the panels. Add a bit more glue on the dowels for a more secure structure. To make the storage unit wider, add shelf dividers, particularly two vertical ones.
Step 7
Add the hardboard backing. This is dependent on your own needs, so feel free to be creative.
Step 8
Drill in four clearance holes in the Kallax top and parallel pilot holes in the two wooden blocks. Put in screws to tighten them in place.
Step 9
Attach the IKEA Gerton tabletops. Similar steps as before, use existing plywood and drill in some clearance holes. Measure according to your unit.
Step 10
A lot of the steps will vary according to the space you have in your room, so be flexible wherever needed.
Warnings
Just be sure to measure before every step, so the final product isn't wonky or unstable. But in the end, you should have a lot of storage units for your desired sewing table.
10. Minimalist Sewing Desk
If you're worried about tampering with the aesthetics of your craft room, then this project is exactly what you were looking for. It takes a very small amount of space yet designed to look spacious and professional.
Things to Buy
- 2 36×20 inch boards
- Wood glue
- 4 hairpin legs
- Wood screws
- Paintbrush
- Spray paint
- Fine sandpaper (240 grit)
- 4 3×20 inch boards
Tools You'll Need
- Clamps
- Electric drill
- Plywood saw
Instructions
Cut a longboard into 3×20 inches or follow your own preferred measurements. Have these cut at a store if you're not sure about the exact lengths of the boards.
Step 1
Assemble the tabletops (2 36×20 inch) and use wood glue to attach the three 3×20 boards to the sides of the table, making sure that one side of the table is open for storage.
Step 2
Until the glue dries, use clamps to hold the boards together. Apply clamps on all three sides of the table.
Then, apply wood glue on both sides (lengthwise) to one of the 3×20 inch boards and insert it into the middle of the storage cubby to make it into two separate storage spaces.
Step 3
Paint the four hairpin legs according to your craft room aesthetics and attach them on all four corners of the tabletop from underneath. Two-pronged hairpin legs are preferred over three pinned ones, as it attaches perfectly to the four edges.
Step 4
Fasten the legs to the underside of the table using your drill and two-inch woodscrews. Make sure the screws are sufficiently long to secure the legs.
Step 5
Sand the tabletop according to your preference and then paint it in your favorite color. You can also use polyurethane as a top coat to your table to give it a professional touch.
Warnings
As the wood glue is the most important component of the project, make sure to buy the right brand, and follow the instructions accordingly.
Conclusion
That's all for today. We hope our article has been of some help to you. Let us know your feedback in the comments section. Good luck!
 |
 |
 |
 |
 |
 |
 |
 |

About Alice Davis
Alice is a writer who lives in the City of Long Beach. She has a husband, an exceptionally small chihuahua, and 15-pound Maine Coon. Alice got her bachelor of science in biological science from UC Berkeley. Now, she likes writing about a lot of things; including but not limited to technology reviews, science stuff, and anything food-related.
Leave a Reply
You can get FREE Gifts. Or latest Free phones here.
Disable Ad block to reveal all the info. Once done, hit a button below
 |
 |
 |
 |